
Create a new PowerApp Screen
After Creating a Blank app
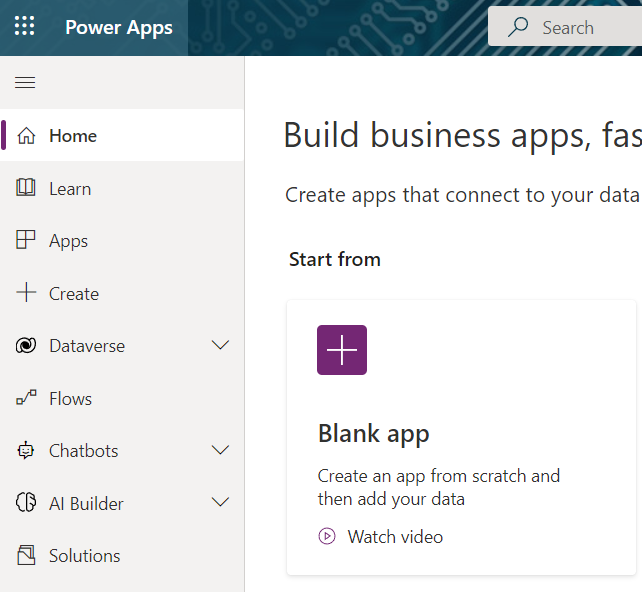
Choose Canvas App To Create A Desktop Style App
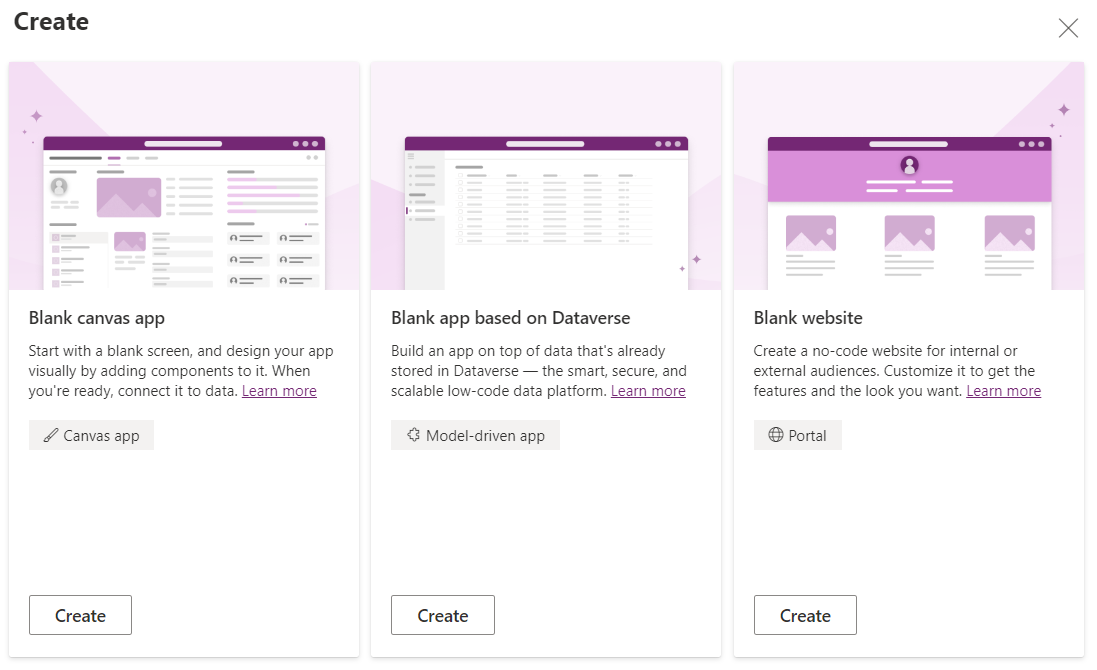
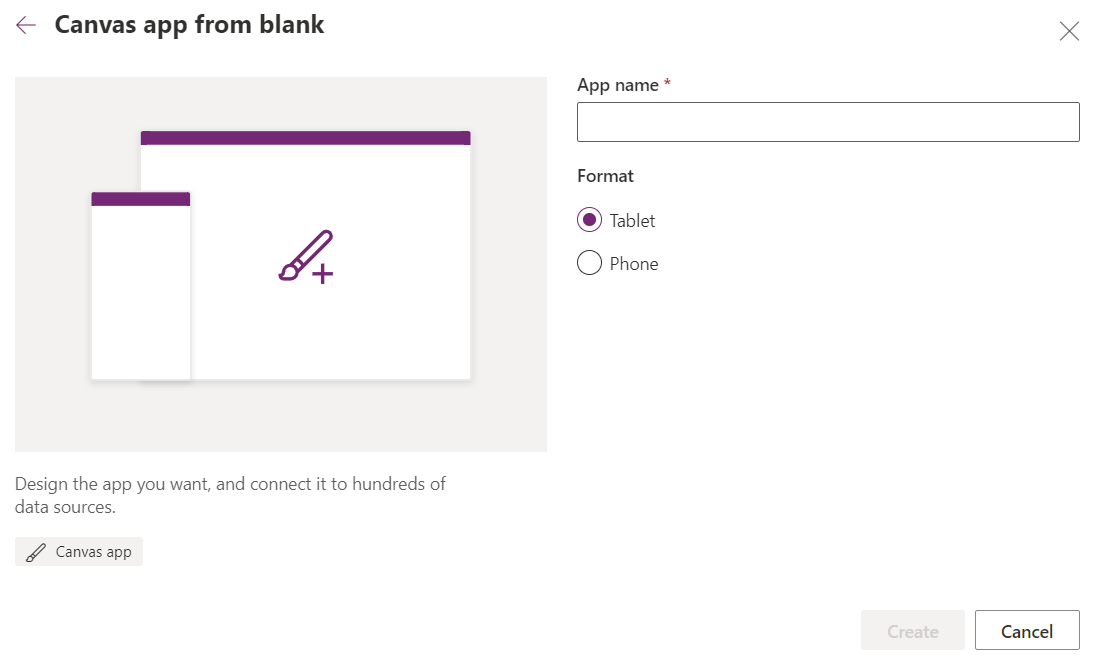
This will Create a App and Will Ask For a App Title. Name it Appropriately and As Descriptive as possible if in a large organization with many power apps. For this example desktop layout will be selected also landscape view on mobile devices.
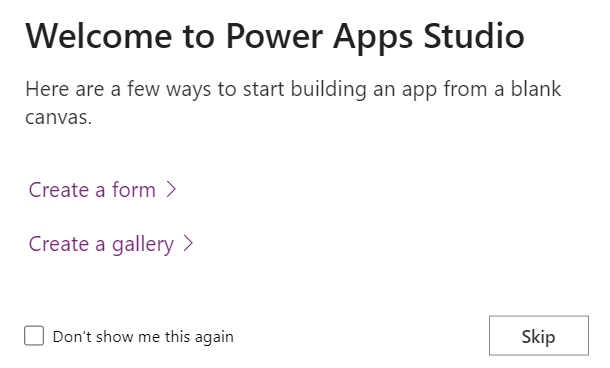
The app creation will commence and the splash screen will appear

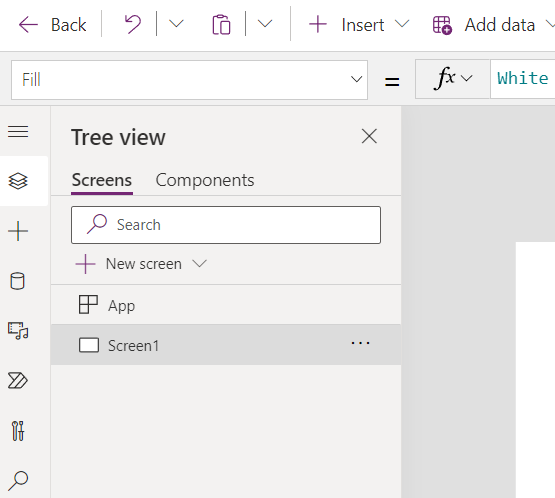
After setup finishes the welcome to Power Apps Studio screen will appear, this provides a shortcut to create Screen1 Form or Gallery to connect to data. This will be Skipped as the first screen that will be created will be the Home Screen with App navigation buttons
The app object will be created along with Screen1 object. The app object is a global object you can use for referencing objects in the application such as screens,
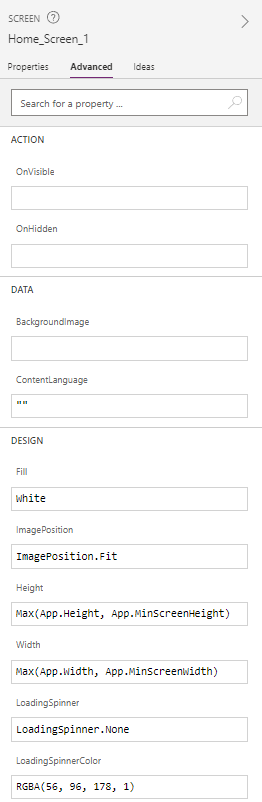
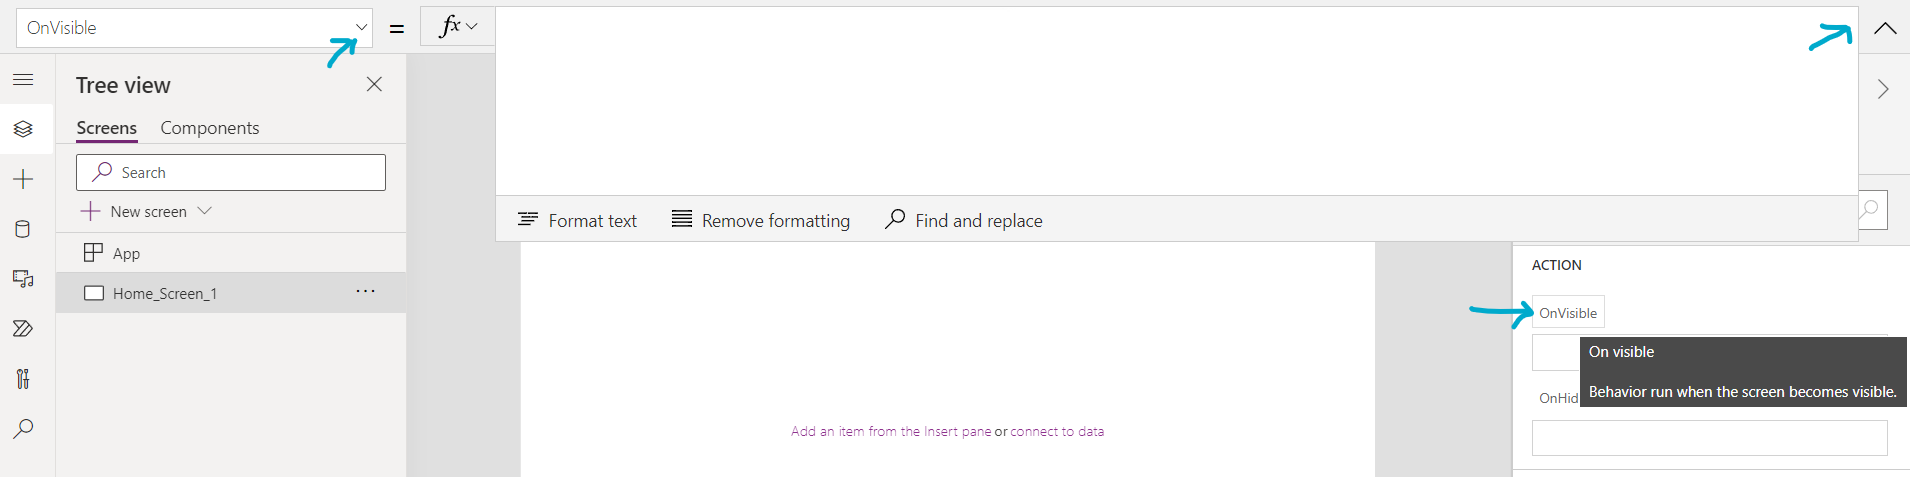
Next Rename the Screen to Home_Screen_1. The Screen Object can be customized with the following Properties which can be set using constants or variables and Action Events which can run functions.
– Action: OnVisible, OnHidden Accepts function calls to run when screen is set to foreground and background respectively,
– BackgroundImage sets Background of screen,
– ContentLanguage default is utf-80 english (can be set to another utf language using the language code),
– Design: Properties accept variables, constants, or enumerations (functions must return value and should not be expected to raise events or change variables)
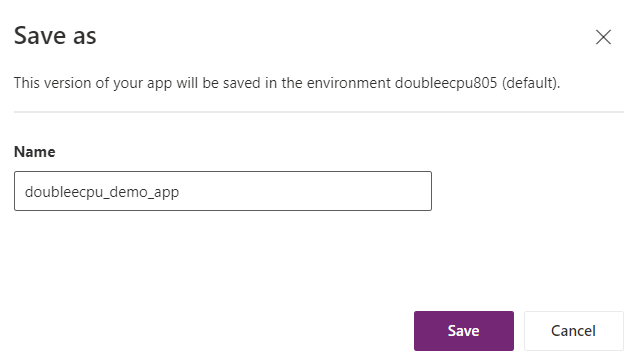
Use the Save Icon or File Save menu to save the App. The app will not be saved unless Save button is clicked. Clicking the save button saves a version of the app to the App
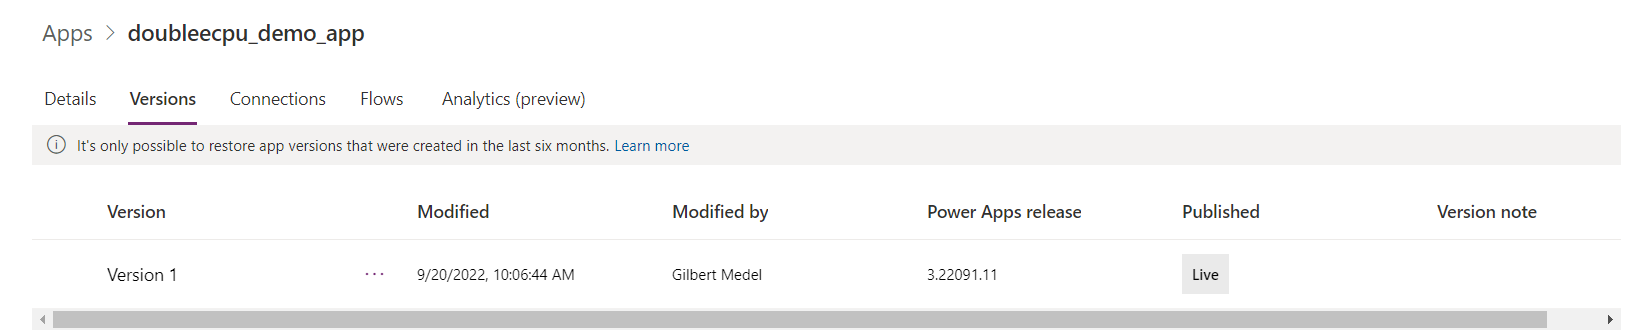
To check version of last saved app clicking on the App Details will bring up the version history. From this screen bad/corrupt versions can be erased and previous versions can be designated and made the current Version.
Customizing the App
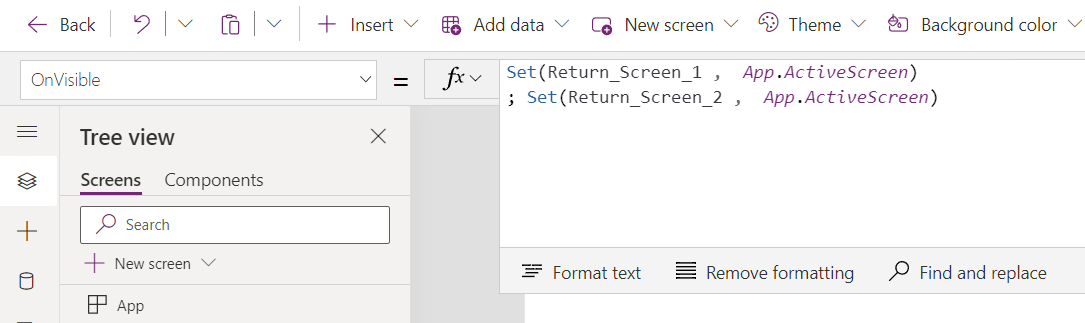
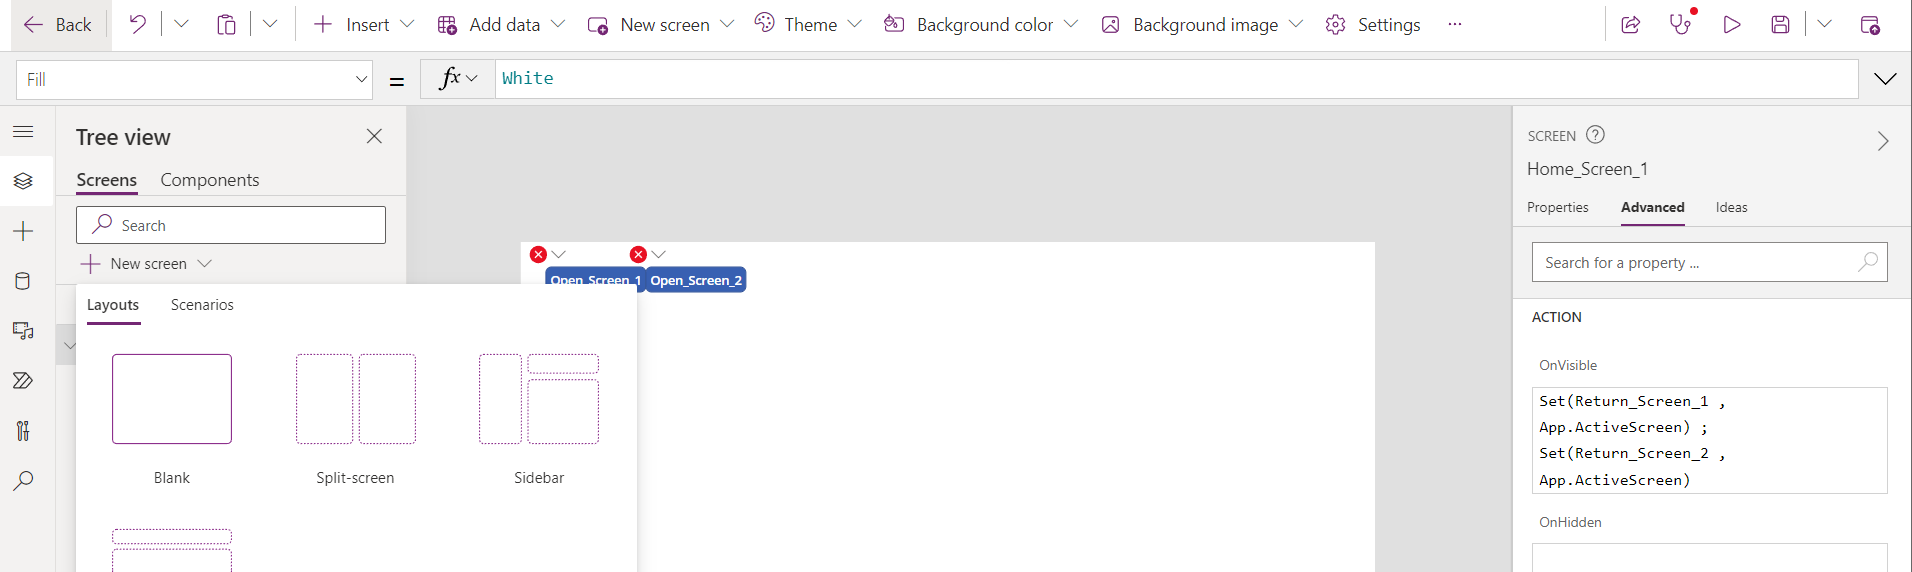
To Track the Current Navigation State of the App variables will be created to store which screen to return to. This app will at least have 2 screen options to return to Home_Screen_1 will have a dedicated button to return to the screen and will reset the return screen variables to prevent any undesired navigations between screens. To start the customization of the Home Screen the OnVisible Action will be set to run a few functions that will set variables to default state. So far in this app will be Screen_1 and Screen_2.
To access the function editor on the Action menu click OnVisible or menu search for OnVisible on drop down. To expand editor click on expansion down arrow.
Start by setting Return_Screen_1 and Return_Screen_2 variables to Home_Screen_1 using the Set( , ) Function and App.ActiveScreen reference to the Home_Screen_1. Using the ActiveScreen reference allows the screen to be renamed without having to change the value in the Set(,) function.
Set(Return_Screen_1 , App.ActiveScreen )
Set(Return_Screen_2 , App.ActiveScreen )
Next Buttons will be added to navigate to Screen_1 and Screen_2 Then Screen_3. So navigation to Screen_1 and Screen_2 will be via Home_Screen_1 and Navigation to Screen_3 will be accessed through Screen 1 or 2 and return button will return to the calling screen using the Return_Screen_1 variable.
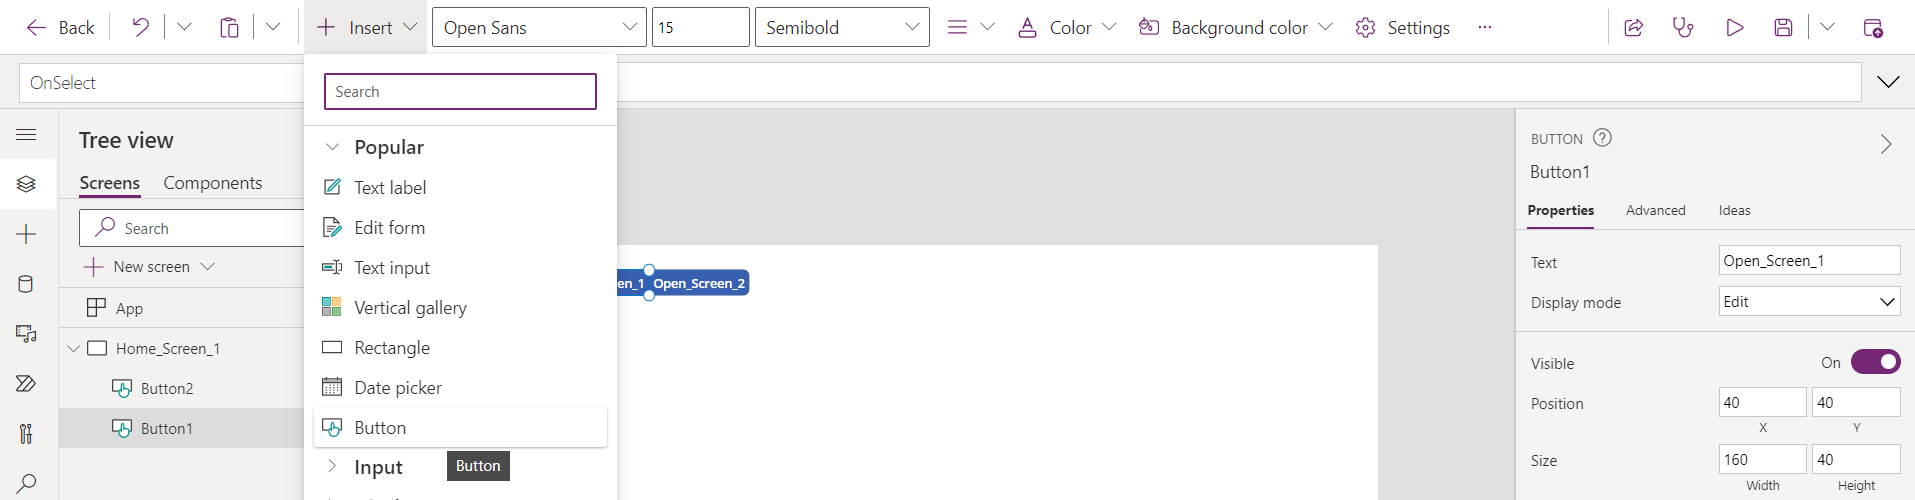
Add Two Buttons to Home_Screen_1 by using Insert Button Replace Text property value with Open_Screen_1 and Open_Screen_2.
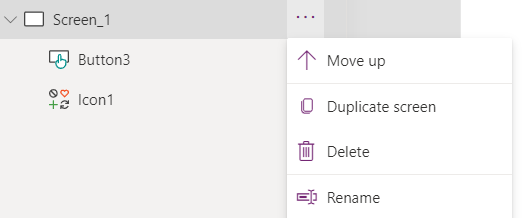
Add two Screens using the + New Screen and rename it to Screen_1. *the Duplicate Screen action on the drop down menu Copies the Screen and Name and aggregates number ending. This will be used later to create Screen 2 to create a screen with the same behavior
On the Home_Screen_1 select button to open screen 1 and under the Advanced tab under Action: OnSelect( ) enter code to open Open screen 1 using the navigate function, screen name and the transition enumeration. Later a data record variable will be set
Navigate(Screen_1, Transition.None)
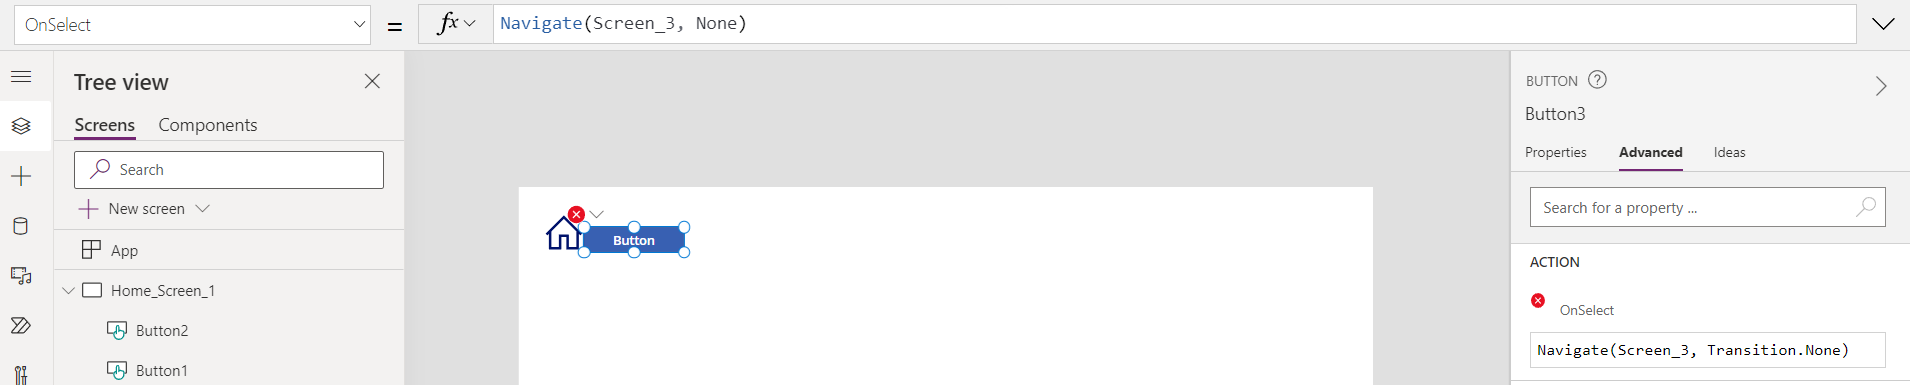
Next on Screen_1 a home icon will be added to return to the Home_Screen_1. Using the Insert -> Icons -> Home then on the OnSelect() behavior set it to Navigate(Home_Screen_1, Transition.None). Also Add a Button rename it to Open Screen 3 and set the OnSelect behavior to navigate to screen 3. Also set the OnVisible() behavior to Set(Return_Screen_1, App.ActiveScreen)
Using the Duplicate command on Screen 1 to create a copy of screen 2.
Add a New Screen and Rename it to Screen_3. Add the Home Icon set it to Navigate to the home screen and add a Back Arrow icon and Set its OnSelect() behavior to Navigate(Return_Screen_1, Transition.None) Also add to the OnVisible Action Set(ReturnScreen_2, App.ActiveScreen)

This is a demonstration of how to navigate through your PowerApp, This is only one of the many ways to manage how users navigate through an app. This navigation layout would next be matched to Functional Overview of data, and Users would select a row of data to get more specific data and more specific data while being able to navigate back to the overview data or start from beginning. See the Next Steps Here or Go To My PowerApps Page